1 Introduction
In my post Entity-Relationship-Diagram I talked in detail about how databases should look like and how their cardinality can be represented. I have done this so far with Drawio. But now I have found a program that not only allows you to design ERDs faster and nicer, but also to use other features like the automatic creation of underlying DDLs: Oracle SQL Developer Data Modeler
2 Installations and Setup
2.1 Downlaod the Data Modeler
First of all you need to download Oracle SQL Developer Data Modeler via this link: Oracle SQL Developer Data Modeler - Download
To download the ZIP file, you need to create an Oracle account. In the course of the download attempt, there will be a prompt for this from Oracle.
Now unzip the downloaded file and place it in a location of your choice. You will find the application at the highest folder level. Folder as well as application file can be renamed as you like.
2.2 Downlaod Java SDK
To use Oracle Data Modeler you still need Java SDK (version less than 11.1). You can download it here: Java SE Archive Downloads
Tip: Download the zip file, extract it and place it in the Oracle SQL Developer Data Modeler folder.
The first time you run the Data Modeler (datamodeler.exe) you will be asked to set the path to the jdk file.
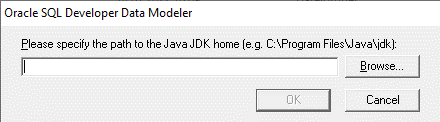
Set the path accordingly and the Data Modeler will work.
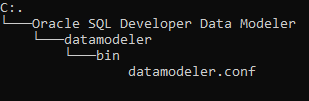
2.3 Change Language
If you want to change the language of the Data Modeler then search the datamodeler.conf file. You can find it under the following path:
Open the file and insert (at any place) the following lines.
#GUI language
AddVMOption -Duser.language=en
#AddVMOption -Duser.language=de
#AddVMOption -Duser.language=fr
#AddVMOption -Duser.language=it
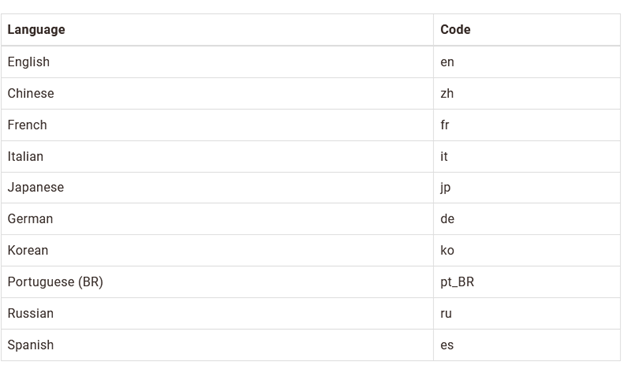
#AddVMOption -Duser.language=esIn this example I have chosen the language English. If you like, you can set the language of your choice (just uncomment the corresponding line and comment out the rest).
I have only listed the most common languages here. Here would be a list with other languages that can be deposited:
3 Oracle - Data Modeler
At the beginning you will find an empty design with a Logical and a Relational Writer. To create the ERD, we will first work with the Logical.

3.1 Creation of an Entity
Click New Entity at the top of the toolbar.

Then you can click anywhere in the Logical Writer to create the first table.
The following window opens:
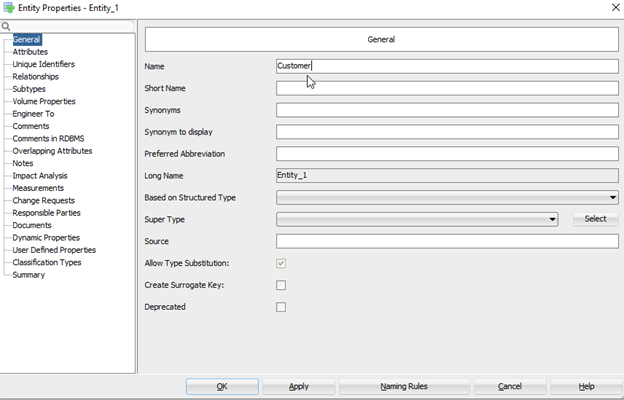
Now name your first table. I will call it ‘Customer’ in this example.
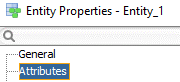
3.2 Creation of an Attribute
Next I select Attributes:
Here I click on the green plus symbol to create a new attribute.
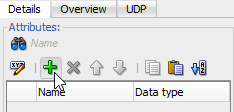
I will call my first attribute ‘Customer_ID’.

3.2.1 NUMERIC
Since I want to use this attribute as Primary Key later, I assign the source type ‘numeric’ to this column. The Data Type is ‘Logical’. Since this field must be filled, I set a check mark at ‘Mandatory’.
Of course, we still have the options here to make further settings such as Precision or Scale.
But what are these settings?
Precision (p): The maximum total number of decimal places to be stored. This number includes the digits to the left and right of the decimal separator. The precision must be a value between 1 and the maximum precision of 38. The default precision is 18. Source: Microsoft SQL Documentation
Scale (s): The number of decimal places stored to the right of the decimal separator. This number is subtracted from p to determine the maximum number of digits to the left of the decimal point. The number of decimal places must be a value between 0 and p and can only be specified when the precision is specified. Source: Microsoft SQL Documentation
3.2.2 VARCHAR
The second attribute I want to add to the table (again with the green plus symbol) should be called ‘First_Name’.
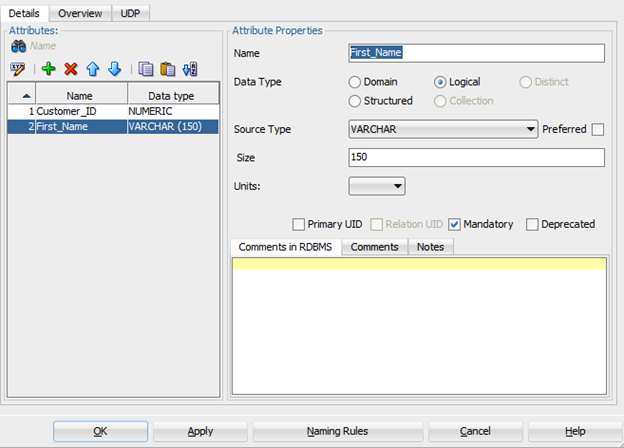
This should be a column for character data, hence the source type VARCHAR with a limit of 150 characters in our example.
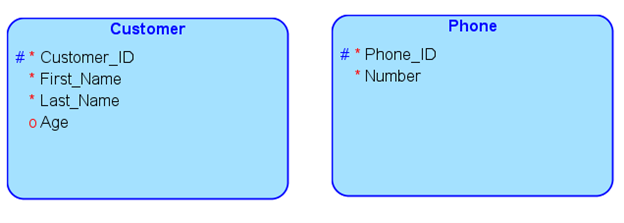
3.3 A Glimpse on the Logical Writer
I will now add two more columns (‘Last_Name’ and ‘Age’) using the same principle, specifying the ‘Age’ column as non-mandatory. Now let’s have a look at the created Customer table:
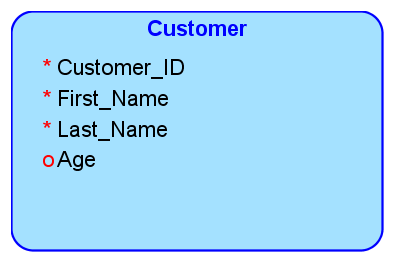
The red asterisk symbols mark columns that must be filled in. The column ‘Age’, on the other hand, has an o for optional.
3.4 Assignment of a Primary Key
Now I would like to assign a primary key.
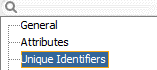
Double-click on the table and select ‘Unique Identifiers’.
With the green plus symbol I create a new unique identifier.

Double-click again on the line marked in blue.
Now go to ‘Attributes and Relations’ and select the column you want to make a Primary Key (here ‘Customer_ID’) and transfer it with the arrow pointing to the right into the column on the right side.
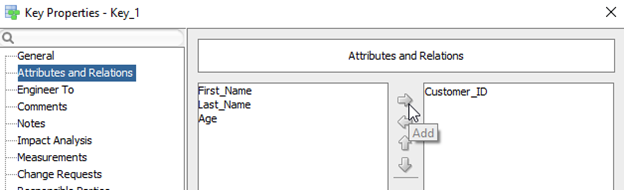
Click OK.
Now you will be kicked out of the ‘Key Properties - Key_1’ window. We are not done yet, so please double click on the blue marked line to get back to the previous window.
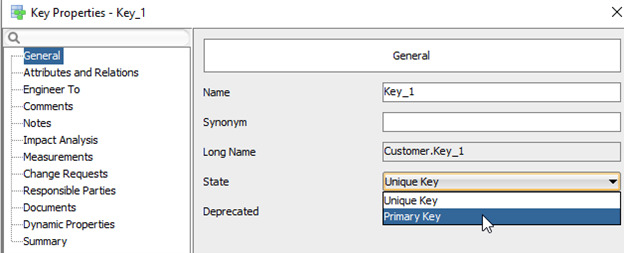
This time we go to ‘General’ and select the Primary Key under State.
I find this opening, closing and reopening also a hindrance, but in my personal experience the Oracle Data Modeler takes over the setting of the Primary Key.
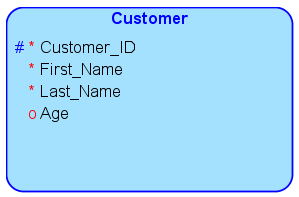
As we can see, our Customer table (or rather the Customer_ID column) has received a # sign, which indicates the Primary Key.
Now I will create another table for cell phones. I will not list the individual steps here, since they are analogous to those shown before.
Here are my final tables:
3.5 Setting a Table Relationship
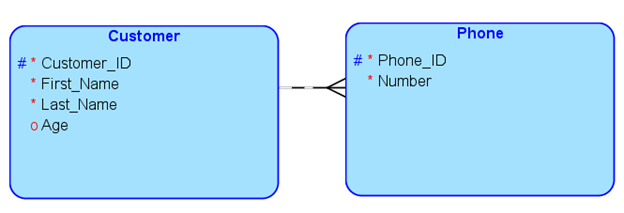
Now we come to the fun part and the reason why I like Oracle Data Modeler so much. We set a connection between the two tables. Since a customer can have one or more cell phones or cell phone numbers, there is a 1:n relationship.
I can set these with the green arrows in the toolbar.
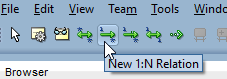
In this example I use the 1:n connections as mentioned before. After you have selected the correct arrow, simply click on the two tables that you want to connect.
Don’t worry, if you want to change the connection type later, this is possible at any time here:
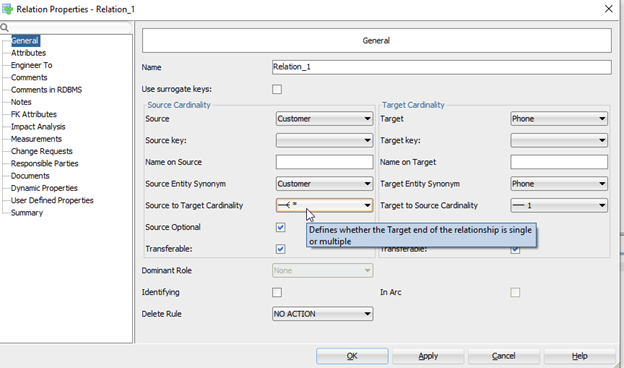
Click on OK to create the connection (the name of the connection is not relevant for me here).
Here we go!
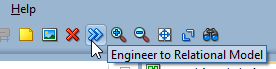
3.6 Engineer to Relational Model
OK great, now we have created two tables and joined them together. Now let’s convert the logical design into a relational one.
We can do this using this icon from the toolbar:
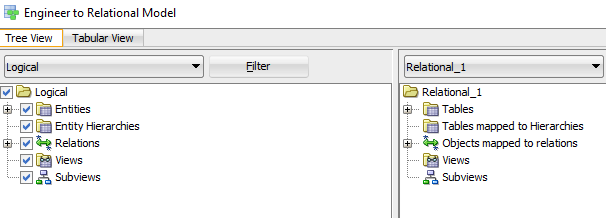
Now we can select which entities and relations we want to transfer, of course we transfer all of them as in the default setting. Don’t worry about the warning signs, they are normal because we didn’t set all of them manually, but the system sets the necessary ones automatically.
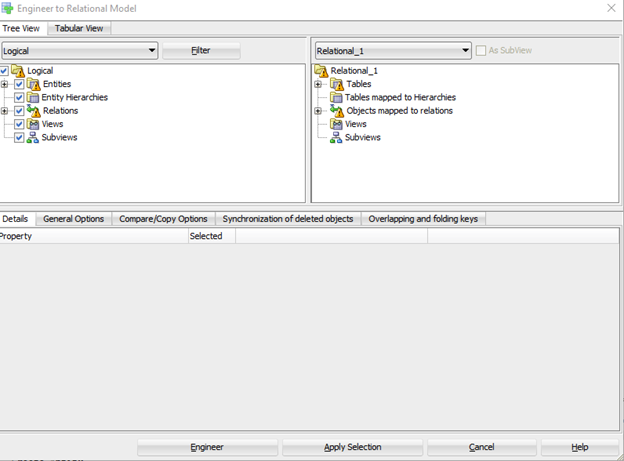
Click on Engineer.
3.7 A Glimpse on the Relational Writer
Great, now we have transformed the logical into a relational design:
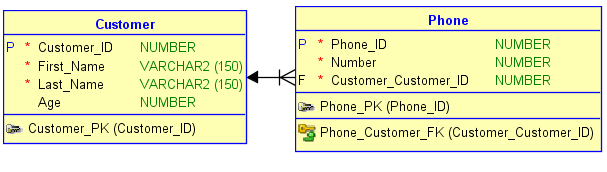
Here we can see which column is a Primary Key and which is a Foreign Key, as well as the tables are connected with each other. The source type of the respective columns is also displayed here in detail.
If you now go back to the Logical Writer and restart the engineering process you will notice that the warning signs shown before have disappeared.
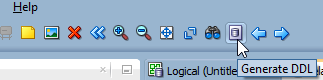
3.8 Generate DDL
Now we come to the second reason why I like using Oracle Data Modeler so much. Not only have I created a beautiful ERD here, but I can also have the DDL output right away.
I now click on the following icon from the toolbar:
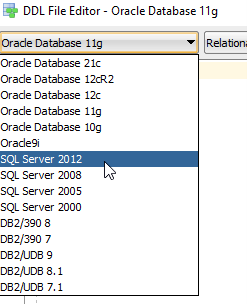
Here I can then select for which database management system I want to create the DDL. In my case I select SQL Server 2012 from Microsoft.
Now all you have to do is click Generate
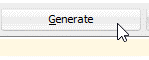
and OK.

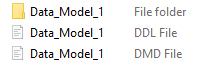
Wonderful, now we have obtained the DDL syntax with which we can create all the tables from the drawn ERD as well as their connections in SQL Server 2012.
Click on Save in the lower right corner to save the DDL.
I do the same with the created design. To do this, simply go back to the Data Modeler and click File - Save as in the upper left corner.
Now we have created three files:
4 Using the generated DDL
Now we use the created DDL in Microsoft SQL Server Management Studio.
If you want to know how to create databases in SSMS, check out this post of mine: Create a Database
Use a database of your choice in which you want to create the tables. I have used my ‘MyDB’ again for this.
You can simply copy and paste from the .ddl file here.
use MyDB;


CREATE TABLE Customer
    (
     Customer_ID NUMERIC (28) NOT NULL ,
     First_Name VARCHAR (150) NOT NULL ,
     Last_Name VARCHAR (150) NOT NULL ,
     Age NUMERIC (28)
    )
GO

ALTER TABLE Customer ADD CONSTRAINT Customer_PK PRIMARY KEY CLUSTERED (Customer_ID)
     WITH (
     ALLOW_PAGE_LOCKS = ON ,
     ALLOW_ROW_LOCKS = ON )
GO

CREATE TABLE Phone
    (
     Phone_ID NUMERIC (28) NOT NULL ,
     Number NUMERIC (28) NOT NULL ,
     Customer_Customer_ID NUMERIC (28) NOT NULL
    )
GO

ALTER TABLE Phone ADD CONSTRAINT Phone_PK PRIMARY KEY CLUSTERED (Phone_ID)
     WITH (
     ALLOW_PAGE_LOCKS = ON ,
     ALLOW_ROW_LOCKS = ON )
GO

ALTER TABLE Phone
    ADD CONSTRAINT Phone_Customer_FK FOREIGN KEY
    (
     Customer_Customer_ID
    )
    REFERENCES Customer
    (
     Customer_ID
    )
    ON DELETE NO ACTION
    ON UPDATE NO ACTION
GO
I always open this file with Visual Studio Code but you are free to use your program of choice.
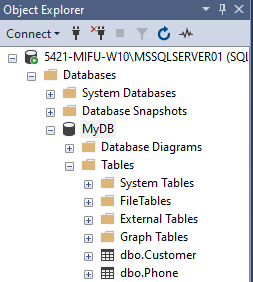
Perfect worked.
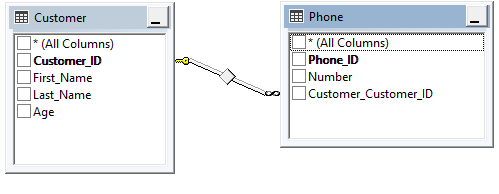
Also the view on the connections of the two tables is displayed correctly.
Now let’s try to insert some values into the created tables and test queries.
The Customer table must be filled first, as the Foreign Key (‘Customer_ Customer_ID’) is stored in the Phone table and references the other table (Customer).
Filling the Customer Table
INSERT INTO Customer VALUES (1, 'Andrew', 'Evergreen', 32)

SELECT *
    FROM Customer;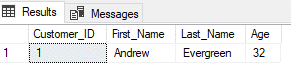
Filling the Phone Table
INSERT INTO Phone VALUES (1, 004185615224, 1)

SELECT *
    FROM Phone;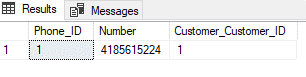
Join Query
SELECT t1.Customer_ID,
       t1.First_Name,
       t1.Last_Name,
       t1.Age,
       t2.Number
    FROM Customer AS t1
    LEFT JOIN Phone AS t2
        ON t1.Customer_ID = t2.Customer_Customer_ID
    ;
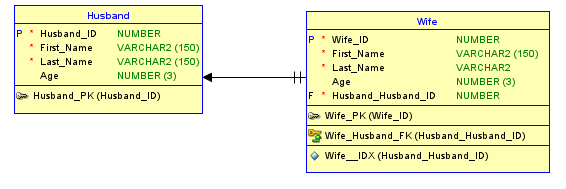
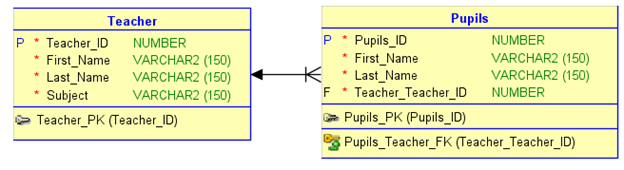
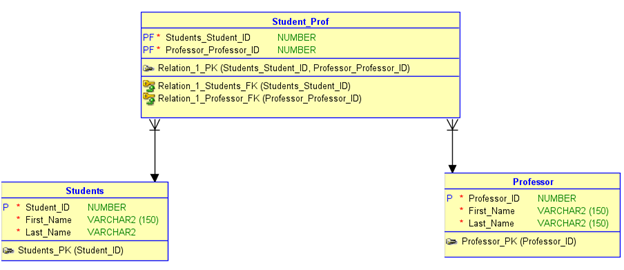
5 ERDs from old Posts with Oracle Data Modeler
I have always created ERDs in my previous publications. Now I would like to rebuild the created ERDs from three posts here with Oracle Data Modeler.
6 Conclusion
In this post I showed how to use Oracle Data Modeler to create ERDs, define relationships between tables, and output the associated DDL.